Layer up!

Ever since starting to make computer-based music, developing a smooth workflow has been a huge challenge for me. Controlling and playing different devices while drumming is not exactly a walk in the park.

Before this I had no idea how to organize my instruments or samples into my setup so that each device I’m using would have it’s own dedicated purpose.

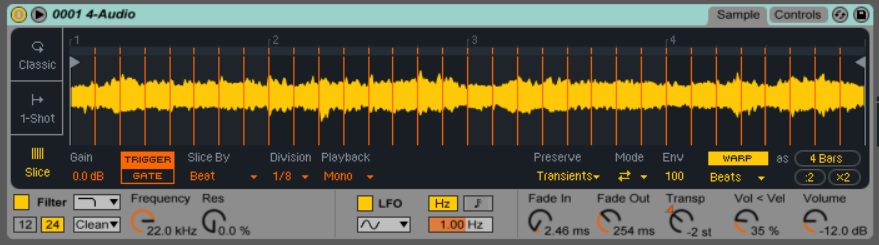
I had been trying out pretty much every kind of sounds with each device I had, which ended up making playing really damn complicated, as you can see from this very elaborative demonstration.

giphy

Layer up!

To reach another eureka moment I had to apply a trick that actually had more to do with mixing and sound design rather than workflow. The original purpose of the tip was aimed at improving the overall sound of the music from 2D’ish feeling of flatness to something more richer and interesting to listen to.

The tip comes from the book Making Music, which is my bible and probably favorite book of all time (Seriously, get it if you’re interested in these things!).

The trick here is to listen to the audio in layers in order to figure out the foreground, middle ground and background elements of the entirety – just like you would do when taking a picture.

Processed with VSCO with a5 preset

Getting the big picture

For instance, in this picture (from the sampling post) the green coke glass in front is the eye-catching foreground layer, the corner of the room represents the background layer and middle ground layer covers everything in between them (light, plants, table etc.).

When applying this method to audio, I found that the best way to separate audio layers by ear was the pitch of the sounds. High pitched, short sounds felt like a good foreground element, because they grab the attention of the listener more easily. Meanwhile, medium and low pitched instruments like keyboard, bass and drum sounds tend to fall back into the middle and backgrounds, which create a nice framework for the music.

Locking into a setup (finally!)

Once figuring out the parts that different pitches play in the whole mix, I realized that I could use that logic to organize them into my setup.

The high pitched sounds, which become lead melodies (foreground), could be played by drumming the drum pad in front of me. The lead melody will, as a result, grab the attention when both watching and listening to my playing.

The middle and background sounds will be left to my controller device and drums, which will fill up the remaining gaps in the overall mix. The controller will also handle all the loops that consist of these kind of sounds.

So now, every time I start on a new idea, not only do I know what kind of sounds I’m looking for, but also I can immediately put them into their right place and device.

This way I’m going to save a lot of time and effort when composing, and ultimately develop a routine to my music making process, as well as playing the finished pieces more effortlessly.

And also, now I know pretty much know what to do when my tracks sound a bit too 2D!


Round two, fight!

It’s time to get crackin’, since my latest challenge is to make three new tracks by the end of the year. I wanted to start a new track by trying a certain very simple technique for melodic arrangement.

Once again I was facing an endless collection of different options from where to choose your instruments and sounds when composing electronic music.

The solution

As I was planning my strategy for tackling this issue, I was reminded by a tip in Making Music’s certain chapter, which Ableton has actually put online as a teaser here. The basic idea is to use only one sample to create all the sounds for your track.

I found this tip quite helpful for a couple of reasons:

  • I’ve always found specified limits and boundaries to actually boost my creativitity. It’s why I like to use a smaller number of drums in my drum kit setup for instance.
  • This technique forces me to really spend time in learning different functions of my music making software, Ableton Live 9 in my case.

Puzzle it up

I took the same approach to writing as I did with the first track, which turned out to be surprisingly fun and effective in the end.

  1. Write a short sample of melody or chord progression
  2. Cut the sample into pieces
  3. Rearrange the pieces by finger drumming to make a new melodies

The difference this time is that now I’m going to make all the melodies out of this sample only as opposed to adding new instruments to the mix.

Tweak it!

Obviously this technique calls for some hardcore sound editing and manipulating. I tried everything from transposing the pitch of sample up and down to stretching the sample.

After some days of work, I managed to make three new elements out of the same sample using only the stock effects and tools provided in my software! Have a listen here if the player below doesn’t work.

I started by playing a few chords and harmonies with piano and guitar samples [Original Melody]. Then I turned it into three new distinctively different, yet somehow similar sounding elements [#New String Instument, #New Robotic Pad Noise & #New Piano & Guitar].

When played separately the clips sound pretty strange, but together the result is actually really fascinating. But I’ll leave that for you to find out later!

A great thing in this technique in my opinion is that the initial melody doesn’t have to pure gold to start with, as the rearrangement of the pieces turns the original sample into something unexpected.

Next: bring in the drums!

Things should get REALLY interesting as next up it’s time to add drums and start turning these sounds into a whole arrangement.

The battle of the red round button

I’ve made it! It’s a day later than I had set my deadline but to me, after weeks of work, finishing is what counts the most right now. 

This song was recorded at one of bands’ practice pad with two microphones. My goal was to record a live take and use my gear as much to their potential as possible.

Things I had to do while playing the song:

  • record a clip of the main theme melody when starting the song
  • launch and stop pre-recorded melody loops in the right moment
  • play bass sounds from a drum pad
  • add and control effects on the go
  • record and play live drums

All at the same time…

The battle of the red round button

Before recording, I had to do figure out which sounds would come out from which gear.

In front of the snare drum, I put my drum pad which I loaded up with bass notes. On the right side, I put Ableton Push and used it to play & record the main melody, loop pre-recorded melodies and twist the effect knobs on top of the white grid.

As far as drums go, I used a bass drum, snare drum, hi-hat cymbal and a ride cymbal (absent in the picture) to provide all the percussive parts.

Door (2).png

The whole recording process was more arduous than I expected. It felt like a battle against time, my gear and body coordination skills.

It took several takes after to get the song arrangement finally sorted out, since every take was a little different to each other in length.

And there were a lot of mistakes too. Sometimes in the heat of playing the song, I hit wrong buttons that launched wrong clips at wrong time to mess up the structure completely.

Other times, I had the drum pad to battle with. It kept changing it’s settings without warning mid-song if I didn’t hit my drum stick just at the dead center of the pad. When this happened, all that could be heard from a particular pad was mere silence.

This was infuriating at times and the whole process actually took several days to complete.

But!

After trying long enough, I managed to record a full take that held it’s form together well enough and I wasn’t messing around with my playing.

After some very amateur mixing and mastering, the track was ready!

And here it is (click here if it doesn’t work):

Remember my last post where I turned random objects into instruments? There’s some of them in there too, but I’ll leave you the task of finding them!

It ain’t over yet!

I still want to record a video of me playing this song to prove that I can actually play it live, which is the main goal anyway.

So this project is not quite over yet!


Headspace

Getting back into creative headspace is extremely tough. The struggle towards the breakthrough, though, is a great opportunity to learn how to be more productive than ever.

”Creative time is short, and you have to move fast.” (taken from Making music)

Well, I thought this moment would come sooner or later anyway.

The classic case of ”writer’s block”

I had laid down a theme melody for the track. I even had a track structure that I made in the previous post. Unfortunately I had nothing to say or add to the original part. Every new note or sound felt shitty and didn’t lead me any further with the composition process.

It was as if I had build an empty house. I had the foundations, the walls and roof in place, but didn’t know how to decorate the insides.

This went on for a whole week and the pressure cooker (also known as my head) started to boil over, as you can see in this very informative GIF:

giphy.gif

After already struggling for a week with unproductivity, getting back to the project over and over again felt intimidating and uncomfortable. I can only describe it as… Well, imagine if you asked Frodo to go back to get the ring from Mordor.

I had to let out some steam by confessing the issue and seek help.

Step 1: Letting out the steam

A promising place for an outlet (and help) seemed to be the IDMforums, which I had joined at the beginning of this project. It’s a community of electronic music makers that I’ve found to be really helpful and inspiring during my (yet) short membership period.

After seeking advice from other members, it became clear that this kind of creative block was a pretty common problem for most music makers. And happily enough, by putting up a thread about my issue, I found out some really helpful tactics to stay productive in my project:

”I usually find what works best is to loop the part I already have and then just try out different sounds / instruments and play along with it without any expectations and see where that takes me..and it usually leads me on to the next step in the project..something clicks or sounds cool and then I focus on that part and begin the process all over again.”
by Ambient Mechanics

In addition to receiving practical advice to power through the creative blocks in music making process, I also got a great advice on how to avoid them in the future more effectively!

”Consistantly working on something to do with your music—better yet scheduling it at the same days/times—will make it easier for you and your brain to get into that writing mode. It isn’t easy to do and I’m not good at it, but with out consistancy and/or a schedule your brain will have to do much more warming up.
by relic

Step 2: Taking a break

Something that came up repeatedly in my thread was that it’s important to not worry too much.

So it was time to take a deep breath and sleep one more night to clear my head.

(zZz..)

Step 3: Wait for it…

The next day I got back to the task at hand. I sat down and opened the project file again. I took Ambient Mechanics’ advice of patiently browsing, searching and trying different sounds that were at my reach.

And then the right sound came by.

Step 4: Ka-ching!

Once I hit the first notes of that sound, I was lit. This was the much needed fuel to my creative gasoline.

In a literal outburst of ideas that lasted for 5-10 minutes, I came up with several new harmonies that not only suited the theme melody, but also were perfect transitions to new sections!

Multiple layers of goodies! You will hear them soon enough… 😉

How to avoid blocks in future?

I learned that once those golden, creative moments come along, it’s important to seize them by capturing every sound, note, rhythm, hit and noise I make then and there.

And I’m actually glad that I struggled because it was a great opportunity for me to learn how to be more productive.

I’m now more aware of what environment works for me the best, how to practice creativity and how to organize my daily schedule to support my music making or blog writing processes.

I can see the finishing line

Hey! Thanks to overcoming this struggle, I’m now closer than ever to finishing my own music project.

Next step is to get back to the drum kit and practice the new parts, and finally start practicing the damn thing live!

Cover photo by Samppa Fjäder.

Get graphic, son!

Creating a good sounding theme melody for a track is a win in itself. But one melody isn’t enough to make the whole track. So how can I grow that one part into a complete, finished track?

After coming up with my first melody in the previous post, I was so excited that I couldn’t contain myself from going back to the drums and try playing along it in reality.

I loaded the drum pad with basic bass note samples that match the melody, put up a microphone and this happened (click here if the video doesn’t work).

Playing along that one melody part was fine enough at this point, but I found it hard to continue the track with anything that sounded exciting. And I can’t really play just that one part for three or more minutes and call it a song. That’s boring as hell, right?

Something interesting and notably different has to happen. The problem was, I had no idea what that could be.

I was stuck.

Help is on it’s way

It was time to grab the holy book, Making music, to help this poor bastard out. And it didn’t take long until it provided me with the help I needed right now.

The solution for my of lack of inspiration was to listen carefully to a track that inspires me. The objective is to make a list of different elements I heard in it.

Those could be things like what kind of sounds and instruments are being used and – more importantly for me – at what point are they being used?

I chose Bonobo’s track ”Ten Tigers –  Bengal Edit” for this experiment. I listened to it over and over again paying close attention to:

What instruments are being played?
When are they being played?
How long is the intro?
How many other song parts are there besides intro? How long are they?

However, as I was listening to the track countless times, I felt I needed to go further than making a simple list.

Get graphic, son!

To get the big picture of the track I was listening to, I started drawing a visual arrangement of the elements I was hearing:

The result was a ”start to finish” timeline view of the track. This way I got a sense on how many song parts and instruments the track contains.

D2FA8459-8562-41C7-A75B-BDCF0882A0FB
Bonobo’s Ten Tigers – Bengal edit (as I heard it) and a quick Finnish lesson!

I then draw a similar ”map” for my own track using Bonobo’s track as a reference. It’s a timelime of sounds and elements that should be enough to make my track sound interesting as well.

And here’s a structure for my track!

This map helps me stay focused on the composition process by giving clear boundaries on the track structure and elements.

Better yet, when I play the track on drums, the map should help me focus on playing the pre-recorded clips in correct order and not get distracted by being uncertain of what part to play next.

The most important thing, though, is that I have a clear vision of what I need (and create) in order to finish this track.

What next?

So from now on things are getting really interesting. Next time I’m posting I should have a ready structure for the track, which means I’m ready to play it live on the drums from start to finish! Yikes!!

Go home, you’re blank! Part 2/2

So the big question remains: How to start a track? There are millions of ways to begin.

Prompted by other people’s experiences and strategies I found out in Part 1, and listening to music that inspires me, I found new clues that could lead towards the inspiration I was looking for.

Since I have been lately listening to Bonobo a lot, I took it as my beacon of interest.

I discovered that the things I enjoyed the most in Bonobo’s music are a result of some really skilled and creative “sampling”.

Inspired by this finding, I set in orientating myself into the topic of sampling. I found this article, written by Cristofer Odqvist, to be very useful in my research. It discusses the legality and plagiarism matters that revolve around the use of samples.

(Suddenly I pictured myself sitting in a jail cell and didn’t like what I saw.)

The article provided me with good tips on how to approach sampling in a creative and legal way.

The “Get out of jail” card

I decided to purchase ready-made music samples from Samplephonics. They are perfectly sufficient for composing a short melody for this purpose. Also, this way I’m avoiding any copyright infringements.

So now that peace of mind was restored, I put together a short clip of music using different instruments from the samples I downloaded.

I then, encouraged by Odqvist’s article, modified the sample by reversing and transposing it.

Slice it up!

I found a cool way to re-organize the melody I compiled. It’s a function, which allows me to slice the whole music clip into little pieces.

There you go, all chopped.

Playing the sample like this turned the airy ambient sound into a nice rhythmic pulse, once I added some effects into it. It actually felt like drumming!

The best part, though, was that this technique makes the end result sound like something I created, even when the original file consisted of ready-made melodies. Check it out:

Back on track

I found sampling to be the best way to find inspiration in my situation. It feels like a fun and familiar way to create a melodic foundation for my track.

And after all, I wasn’t far out from my comfort zone with “drumming” the chopped melody! 

I’m now able to make great progress with my track and soon return back to jamming in the practice room! Yay!

Go home, you’re blank! Part 1/2

It’s back to the drawing board -time. Before I can return to the drum kit, I have to solve a problem. And it’s a big one: What do I want to sound like?

So when I double-clicked to open Ableton Live and set about creating stuff, I was treated with the most terrifying sight I can think of.

A completely blank project file. I’m staring at an endless void of possibilities.

blank
Pure horror.

Into the void

Having endless possibilities sounds like a good thing. But in a situation like this, where I need to draw creative inspiration out of nowhere, it’s actually stressful.

Being a drummer in different bands, I never had to provide much melodic input. Other musicians were responsible for that, while I was able to concentrate on bringing the beat.

Considering melodies lead me to more questions.

What tempo should I go with?
Which instruments do I want to use?
What effects should I apply with them?

There’s exactly 52 197 691 different options to each question. Should I just go through all of them?

Ain’t nobody got time for that!

To combat this nightmare, I have acquired a book called 74 Creative Strategies for Electronic Music Producers, written by Dennis DeSantis. It offers practical and concise strategies to help a music maker power through a creation process in a software environment.

I’m going to utilize this book probably through the entire process, it’s my favorite book of all time right now.

I also consulted other electronic music makers through Reddit and IDMforums for fresh thoughts about incorporating drums into electronic music. I got some really inspiring comments there, thank you to the people who shared their experiences!

“Usually, I’ll come up with a cool melody, bassline, or chord progression on the keys, then I’ll drum along to it a bunch of times until I settle into a good beat.” (PattycakeMills in Reddit)

In addition to this, I had a helpful suggestion from my bandmate Jussi of Haraamo. He encouraged me to just start creating the song without thinking too much about the sounds. The fine-tuning will come later.

Time to get cracking

With all of the above in mind, I set about trying different approaches to figuring out a good sounding foundation for the track.

Find out what I came up with in Part 2 tomorrow (Sunday)! It contains the first audio samples of my project.

Stay tuned!

There and back again

What is the difference between composing a piece of electronic music compared to a rock song? I found it out the hard way in my first playing session.

I was sitting behind my drums, about to start jamming with myself (if that’s a thing?). But looking at my weapons of choice, I discovered a problem. I had imagined the creative process completely wrong way around.

Here’s what I learned today:

Weapons of choice

As the platform for all composing, recording and any digital noodling, I’m using a software called Ableton Live 9 through my computer.

What about the hardware, then? Using my computer keyboard as an instrument doesn’t really strike me as a worthy solution. Imagine how strange that would look in a stage? You couldn’t tell if I was playing music or watching Netflix.

To partner the drums with some exotic strangers, I’ve summoned my Ableton Push (left) and Alesis Samplepad Pro (right). I planted them in midst of my kit so I can reach them when sitting behind the drums.

Now I’m able to reach the sweet loving union of electronic and acoustic sounds! And that means, it’s….

…time to jam!

So now that the gear was all set, I was able to start jamming! But I soon discovered that jamming in a digital environment doesn’t really work the same as in a traditional band environment. Loading up sounds into the computer wasn’t exactly the same as plugging a guitar or a bass into an amp.

And also, what sounds? I hadn’t thought this part through at all. The software has a great bank of default sounds in it, but I didn’t have time to go through and audition every single sound and instrument. There’s like a thousand of them.

It was clear from the first minutes that I was unprepared.

At the pad
Am I playing music or watching How I Met Your Mother S07E18 ?

A New Hope

(Can you tell I’m a Star Wars fan?)

I would have to prepare the entire song structure, create melodies and suitable chords to play before I can go play the drums. When that is in order, I am able to actually perform the track.

So I ended up in concentrating on getting the setup right this time. Now I would find out if my idea could actually work in practice.

Even though I didn’t have great sounds to play with, I was able to perform pretty well with my weapons of choice. I left the practice room feeling that I can totally do this! However, the real work is just about to begin.

So it’s back to the drawing board, then! I’ll be back in couple of days with another post about how I’m getting into creative mode at home.

Just a man and his drum kit

It all started some time ago with an urge.

The Urge

I started playing drums at the age of 10 and took few drum lessons at that time to get started. So it feels safe to say that I’ve got the basics of drumming pretty much down, but I don’t really have any music theory background – I am 95 % self-taught as a player.

My will to develop as a player has always been driven by the sheer passion towards playing and creating music in my own terms rather than practicing to be really technically accomplished. Now, 17 years later, I’m still left with an indescribable need to create more.

I have played drums in a number of music releases in my bands, but I never published my own music. That’s mostly because the past few years I have spent all my time filling that urge by playing in bands with my good friends. And I still intend to keep on doing it. Another – and admittedly the real – reason is that I have felt really insecure about my skills and talents as a composer, since I’ve never really had to do it in the bands that I’ve played in.

Still I’ve kept an idea hatching in my brain, that someday I would like to try make my own music and see how far I can go in doing everything myself. It seems now that this inner artist of mine won’t give me any more rope in sliding away from it. The urge to just release this idea out of my head and into practice has grown unbearable, no matter how bad or good an idea it could be.

By writing this blog, I will hope to overcome the insecure feelings and obstacles that occur to me by writing and reflecting openly and honestly on them.

Ideally by doing it, I will be able to reach my goal.

The Goal

(Cue heroic music.)

My goal is to create, record and release a song that I can perform all by myself without compromise, using my drum kit and a bunch of electronic music gadgets that I’ve come to own. No other people, band members or producers involved.

Just a man and his drum kit – plus some other shit he’s got laying around at his apartment.

(The music stops abruptly.)

Suddenly there’s an orchestra of alarm clocks starting their chaotic symphony inside my head:

The Challenge

How the hell can a drummer like me, who…

  • has basically no music education background
  • doesn’t play any melodic instrument at all
  • has only two hands and two feet to spare

…create and perform his own music? That’s impossible! You need to grow more limbs, dude.

And that’s what intend to do! Figuratively speaking anyway.